
Many times when we are not at home, we want to know the situation at home. At this time, you may think of needing a web camera for monitoring, but as a 410c open hobbyist, it is too wasteful to buy such a camera. Today, I will take everyone to use the dragonbaord 410c development board in my hand to implement some simple cameras with motion tracking function. I don’t talk much about nonsense.
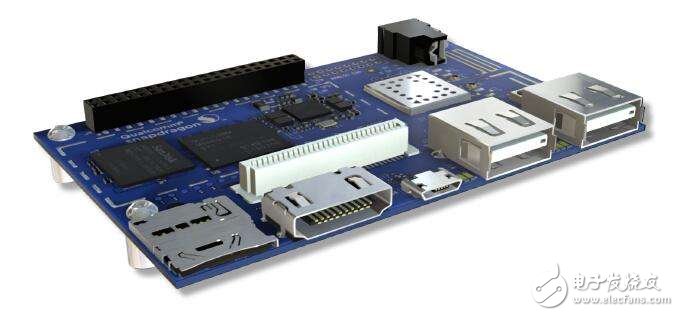
Prepare a dragonboard 410c development board, a USB camera, mouse, keyboard and of course adapters and wifi hotspots that can access the network.
Here the mouse and keyboard are mainly used for development. If your dragonboard 410c development board has already installed the debain operating system, our next work will be completed on the dragonboard 410c development board. No PC is required. The specific environment is built. Refer to the following:
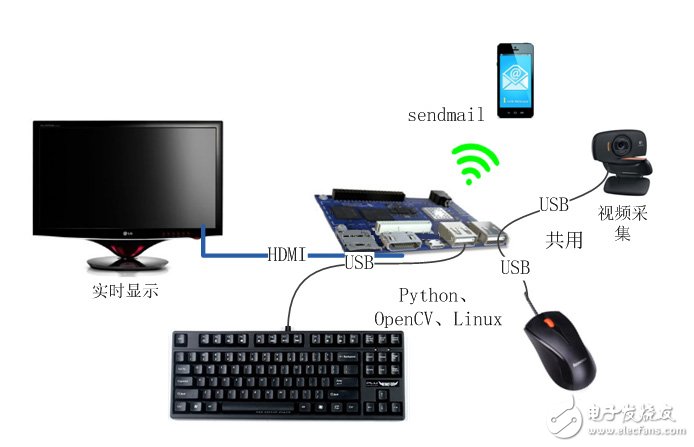
After building according to the above environment, you can start your dragonboard410c development board. First of all, we don't connect the camera and connect the mouse directly, because you need to configure the network of your dragonboard 410c development board and program on it. Run the program after numbering the program. Then, when the mouse is unplugged, connect the USB camera.
Second, the code is implementedThe entire development process uses the Python scripting language to design, and with the help of the opencvpython library for related graphics processing operations, nonsense is not much to say, the specific code is as follows:
#!/usr/bin/env python
Import argparse
Import dateTIme
Import imuTIls
Import TIme
Import cv2
Import numpy as np
Ap = argparse.ArgumentParser()
Ap.add_argument("-v","--video", help="path to the video file")
Ap.add_argument("-a","--min-area", type=int, default=5000, help="minimum areasize")
Args = vars(ap.parse_args())
Ifargs.get("video", None) is None:
Camera = cv2.VideoCapture(0)
TIme.sleep(0.1)
Else:
Camera = cv2.VideoCapture(args["video"])
Framenext = None
firstFrame = None
i=0
While True:
(grabbed, frame) = camera.read()
Text = "Unoccupied"
If not grabbed:
Break
Frame = imutils.resize(frame, width=500)
Framenext = frame
Gray = cv2.cvtColor(frame, cv2.COLOR_BGR2GRAY)
#gray_pre = np.float32(gray)
Gray = cv2.GaussianBlur(gray, (21, 21), 0)
If firstFrame is None:
firstFrame = gray
Continue
frameDelta = cv2.absdiff(firstFrame, gray)
Thresh = cv2.threshold(frameDelta, 115, 255, cv2.THRESH_BINARY)[1]
Thresh = cv2.dilate(thresh, None, iterations=2)
(cnts, _) = cv2.findContours(thresh.copy(), cv2.RETR_EXTERNAL,
cv2.CHAIN_APPROX_SIMPLE)
For c in cnts:
# if the contour is too small, ignore it
If cv2.contourArea(c) < args["min_area"]:
Continue
# compute the bounding box for the contour draw it on the frame
# and update the text
(x, y, w, h) = cv2.boundingRect(c)
Cv2.rectangle(frame, (x, y), (x + w, y + h), (0, 255, 0), 2)
Text = "Occupied"
# caculation feature points
Graynext =cv2.cvtColor(framenext, cv2.COLOR_BGR2GRAY)
#graynext = np.float32(graynext);
Detector = cv2.xfeatures2d.SIFT_create()
Keypoints = detector.detect(gray,None)
Framenext=cv2.drawKeypoints(graynext,keypoints)
# draw the text and timestamp on the frame
cv2.putText(frame, "Room Status: {}".format(text), (10, 20),
cv2.FONT_HERSHEY_SIMPLEX, 0.5, (0, 0, 255), 2)
cv2.putText(frame, datetime.datetime.now().strftime("%A %d %B %Y%I:%M:%S%p"),
(10, frame.shape[0] - 10), cv2.FONT_HERSHEY_SIMPLEX, 0.35, (0, 0, 255), 1)
Cv2.imshow("Security Feed", frame)
Cv2.imshow("Thresh", thresh)
Cv2.imshow("Frame Delta", frameDelta)
Cv2.imshow("keypoints",framenext)
#key = cv2.waitKey(1) & 0xFF
If cv2.waitKey(10) == 27:
Break
Camera.release()
Cv2.destroyAllWindows()
#Send the message via our own SMTP server (sendmail)
Sender = ''
Receivers = ['']
Text = MIMEText('Hello Qualcomm my name is NO1', 'plain', 'utf-8')
Image_url = "./detected_face.jpg"
Image = MIMEImage(open(image_url,'rb').read())
Image.add_header('Content-ID','
Message = MIMEMultipart('related')
Message['From'] = Header("workshop",'utf-8')
Message['To'] = Header("Test",'utf-8')
Subject = 'Python SMTP Test'
Message['Subject'] = Header(subject,'utf-8')
Message.attach(text)
Message.attach(image)
Try:
smtpObj=smtplib.SMTP('localhost')
#smtpObj.set_debuglevel(1)
smtpObj.sendmail(sender,receivers, message.as_string())
smtpObj.quit()
Print"done!"
Except smtplib.SMTPException:
Print "error:send failed"
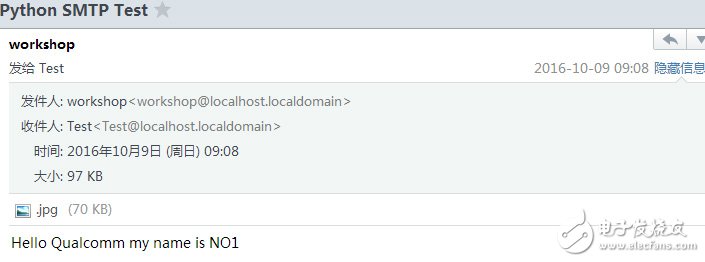
Third, the testAfter writing the code, save it, and then use the Python monition_camera.py command to run the above code. Here we receive the following emails and attachments. Because it involves privacy, the specific tracking target is not displayed. You can see the effect.
Dongguan Rongmao technology Co.,ltd , https://www.szroomoo.com