
Abstract: This article shows how to use a convolutional and pooling layer to build a simple ConvNet architecture based on nolearn, and how to use ConvNet to train a feature extractor before using different models such as SVM, LogisTIc regression, etc. Use it for feature extraction.

Convolutional neural networks (ConvNets) are bio-inspired MLPs (multilayer perceptrons) that have different classes of layers and each layer works differently than a normal MLP layer. If you are interested in ConvNets, here is a good tutorial CS231n – ConvoluTIonal Neural Newtorks for Visual RecogniTIon. The architecture of CNNs is as follows:
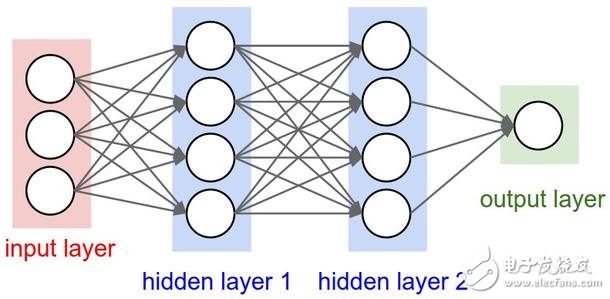
Conventional neural network
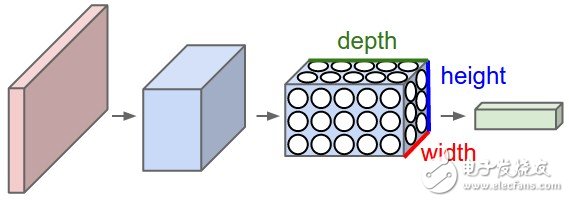
As you can see, ConvNets works with 3D convolutions and is constantly changing these 3D convolutions. I won't repeat the entire CS231n tutorial in this article, so if you are really interested, take the time to learn before you continue reading.
Lasagne and nolearn
Lasagne and nolearn are my favorite deep learning Python packages. Lasagne is based on Theano, so the GPU acceleration will be very different, and it's also helpful in declaring methods for neural network creation. The nolearn library is a set of neural network software package utilities (including Lasagne), which can help us in the creation process of neural network architecture and the inspection of each layer.
What I am showing in this article is how to use some convolutional and pooling layers to build a simple ConvNet architecture. I will also show you how to use ConvNet to train a feature extractor and use it for feature extraction before using different models such as SVM, LogisTIc regression. Most people use the pre-trained ConvNet model, then delete the last output layer, and then extract features from the ConvNets network trained on the ImageNets dataset. This is often referred to as migration learning, because you can use ConvNets layers from other sources for different problems. Since ConvNets' first layer filters are treated as edge detectors, they can be used as common features for other problems. detector.
Load MNIST data set The MNIST data set is one of the most traditional data sets for digital identification. We are using a version for Python, but let's first import the packages we need to use:
Import matplotlib
Import matplotlib.pyplot as plt
Import matplotlib.cm as cm
From urllib import urlretrieve
Import cPickle as pickle
Import os
Import gzip
Import numpy as np
Import theano
Import lasagne
From lasagne import layers
From lasagne.updates import nesterov_momentum
From nolearn.lasagne import NeuralNet
From nolearn.lasagne import visualize
From sklearn.metrics import classification_report
From sklearn.metrics import confusion_matrix
As you can see, we imported the matplotlib package for drawing, some native Python modules for downloading MNIST datasets, some functions for model evaluation in numpy, theano, lasagne, noolearn, and scikit-learn libraries.
Then we define a function that loads the MNIST dataset (this feature is very similar to that used on the Lasagne tutorial)
Def load_dataset():
Url = 'http://deeplearning.net/data/mnist/mnist.pkl.gz'
Filename = 'mnist.pkl.gz'
If not os.path.exists(filename):
Print("Downloading MNIST dataset...")
Urlretrieve(url, filename)
With gzip.open(filename, 'rb') as f:
Data = pickle.load(f)
X_train, y_train = data[0]
X_val, y_val = data[1]
X_test, y_test = data[2]
X_train = X_train.reshape((-1, 1, 28, 28))
X_val = X_val.reshape((-1, 1, 28, 28))
X_test = X_test.reshape((-1, 1, 28, 28))
Y_train = y_train.astype(np.uint8)
Y_val = y_val.astype(np.uint8)
Y_test = y_test.astype(np.uint8)
Return X_train, y_train, X_val, y_val, X_test, y_test
As you can see, we are downloading the processed MNIST dataset and then splitting it into three different datasets: training set, validation set, and test set. Then reset the image content to prepare for the subsequent Lasagne input layer, and at the same time, due to the GPU/theano data type restrictions, we also converted the numpy data type to uint8.
Then we are ready to load the MNIST data set and verify it:
X_train, y_train, X_val, y_val, X_test, y_test = load_dataset()
Plt.imshow(X_train[0][0], cmap=cm.binary)
This code will output the image below (I am using IPython Notebook)
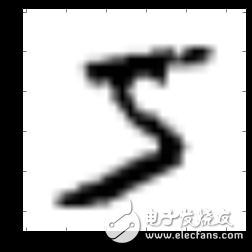
a numeric instance of a MNIST data set (this example is 5)
ConvNet architecture and training5G Integrated Lithium Ion Battery
5G Integrated Battery,51.2V Battery System,Integrated Lithium Ion Battery,Backup Lithium Ion Battery
Wolong Electric Group Zhejiang Dengta Power Source Co.,Ltd , https://www.wldtbattery.com